Showing posts with label MOSS 2007. Show all posts

Thursday, March 19, 2009

Requirement Gathering

Requirements gathering can be challenging at times. Sometimes discussions just go of tangent. Here are a few of the things I have found helpful.

Pre-requirement Gathering - Prior to engaging users for requirement gathering sessions:

  1. Overview of the solution that they're looking at - applicable if you're pitching a solution and are gathering requirements for it. Give a good overview of what it is capable of and as much as possible, relate to generic challenges faced by most organisations.
  2. Give out an agenda, describing what the requirement gathering sessions are for, how long it will take, any preparation that might be required (current processes, forms, etc.).

Requirement Gathering Agenda - When conducting a session, I find that this is a good guideline:

  1. Introduction - Get the users to give an overview of the company (if you haven't already) and where they fit into the organisation, what their department/business unit does and what their role is within that.
  2. Current state – what their day to day activity might look like, what are the things/processes that they are/business unit is involved in. Sometimes you get some valuable information or can derive certain things, i.e. users are disciplined, quick to learn, tech savy, etc. Not everything that they're doing today is evil or bad! Somethings may require minor tweaks, others revamp/overhaul.
  3. Current problems/issues faced with the lack of process/systems - favourite time where you listen to all the challenges, be careful not to go into solution mode (both you and the user). Just document the issues and problems.
  4. Requirements - What they want in the solution. Gather both functional and non-functional requirements. Try to ensure that users can distinct between 'must haves' and 'nice to haves'. Always validate with users.
  5. Wrap it up - let them know what the next steps are. Whether it'd be a follow on workshop, deliverable document, follow up calls to validate items.

Some of the items here have been incorporated from the Microsoft BVPS engagement model.

Friday, August 03, 2007

Want to know about Microsoft's Internal Intranet Implementation?

Jonathan Lewis is the IT Manager for Microsoft Australia. This month Jonathan will be taking some time from his very busy schedule to come down to Melbourne and tell us all about Microsoft's internal Intranet implementation which used SharePoint.

When: 22nd August 2007
Where: Microsoft Innovation Centre, Level 5, 4 Freshwater Place, Southbank

For more information please go to this link: http://www.mossig.net/default.aspx

I'm also scheduled to present on Project Server 2007, so if you want to hear more on the latest offering in Project Server 2007, do come!

I'll provide more information on the topic when closer to time.

Wednesday, February 28, 2007

Backup Script for SharePoint 2007

Thanks (Muchos Gracias) to a posting on MSD2D by Herman Vargas and my colleague, Mario Barajas for translating all the comments that were in Spanish. I've managed to modify the script for a SharePoint 2007 backup. Not the best out there, but it's something.

I have not tested the script fully and assume that it would work. The script keeps the 5 latest backup copies. You can modify the following to suit what you need:

C_BackupPath : The path where the backup resides
C_NamePrefix : Prefix of the filename of the "backup prefix". Example: SharePoint_20070228
C_SiteURL : The URL of the SharePoint Site to be backed up

C_SharePointBin: Path to the Bin directory of Sharepoint installation
C_MaxBackupPerFolder: Number of XML Manifest per C_BackupPath folder.


Below is the .vbs script:

' Description:
' Tool for planning and automating files/entries
' Microsoft Office SharePoint Server 2007
'
' Will generate file entry names with the following style: MOSS_YYYYMMDD
' E.g.: SharePoint_20070228
' If there are more than 5 entries in the directory, then it will choose the one with the oldest date and will delete it

Option Explicit

Const C_BackupPath = "C:\Backup"
Const C_SiteURL = http://sharepointserver/site
Const C_NamePrefix = "SharePoint_"
Const C_SharePointBin = "C:\Program Files\Common Files\Microsoft Shared\Web Server Extensions\12\Bin"
Const C_MaxBackupPerFolder = 5

Dim fso, folder, filedate, f, file
Dim sBackupPrefix
Dim CntXml
Dim DeletedBackup

Set fso = CreateObject("Scripting.FileSystemObject")

if Not fso.FolderExists(C_BackupPath) then
WScript.Echo "The folder " & C_BackupPath & " does not exist!"
WScript.Quit
end if

Set folder = fso.GetFolder(C_BackupPath)
filedate = now
Set f = Nothing

' Counts the number of XML manifests that are in the directory
CntXml=0
for each file in folder.files
if lCase(right(file.name,4)) = ".xml" then
CntXml=CntXml+1
end if
next

'WScript.Echo "CntXml... " & CntXml

DeletedBackup=""
' If it is greater than the maximum
if CntXml > C_MaxBackupPerFolder then

' Looks for the older entry/file
for each file in folder.files
if lCase(right(file.name,4)) = ".xml" then
if file.DateLastModified < deletedbackup =" lcase(Mid(file.name,1,Instr(1,file.name," filedate =" file.DateLastModified">"" then
for each file in folder.files
if lcase(mid(file.name, 1, len(DeletedBackup)))=DeletedBackup then
Set f = file
f.delete
' WScript.Echo "Deleting..." & file.name
Set f = Nothing
end if
next
end if

end if


Set folder=nothing
Set fso=nothing


' Assigns a name of the new file
sBackupPrefix = C_NamePrefix & year(now) & right("00" & Month(now),2) & right("00" & day(now),2)

Dim objShell
Dim strcmd

Set objShell = CreateObject("WScript.Shell")

strcmd = C_SharePointBin & "\stsadm.exe -o backup -url " & C_SiteURL & " -filename " & C_BackupPath & "\" & sBackupPrefix & ".bak -overwrite"

objShell.Exec(strCmd)

WScript.Echo ""& C_SharePointBin & "\stsadm.exe -o backup -url " & C_SiteURL & " -filename " & C_BackupPath & "\" & sBackupPrefix & ".bak -overwrite"

WScript.Echo "Backup of site collection successful"

Set objshell = nothing

Friday, January 19, 2007

Update: Content Types, Document Information Panel and Quick Parts

My previous post probably didn't explain it too well. Here's a link to a better one!

Tuesday, December 19, 2006

Item Security: Unique and Inherited Permissions


Fuji Xerox and Microsoft

The company I used to work for which is Fuji Xerox will be collaborating with Microsoft in the Document Management Solutions Field. All these are happening in Japan. We're looking at possible end to end solutions that include input and output!

Read more about it here!

Friday, December 08, 2006

Content Types, Document Information Panel and Quick Parts

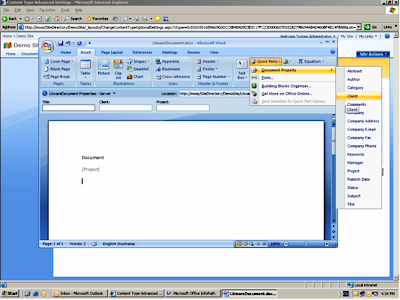
Sometimes document metadata exists inside the document. So how can we update the Document Information Panel and also at the same time update certain fields within the document? By using a combination of content types, the document information panel and quick parts!

You'd probably want to create some Site Columns. Then create a Site Content Type where the Parent Content Type comes from: Document Content Types and Parent Content Type: Document.


Next, add the created Site Columns to the Site Content Type. Then select Document Information Panel settings. Click on Create a new custom template. When the prompt comes up, click Finish. Save the InfoPath 2007 Form Template. Then go back and upload the saved template.

Then click on Advance Settings. Upload a new document template for the document content type. Be sure to upload a .docx. You can just upload a blank document at this point. Then go to a site and create document library. As soon as you've created the document library, enable management of content types in the Advance Settings for the document library.

Then add the newly created content type to the document library. Once that has been added, click on the content type and click on Advanced Settings to edit the document template once again. When editing the document template you will notice the document information panel appear (Be sure to have InfoPath 2007 installed to be able to view the document information panel).

Then in Word 2007, Insert, Quick Parts, Document Property. Select the Property that you created.

Now when you enter a value for the document metadata in the information panel any reference in the document pointing to it via the Document Property added into the document itself will reflect that!

Saturday, November 25, 2006

MOSS 2007 has landed at Melbourne Airport

We at Unique World have recently finished a successful Microsoft Office Sharepoint Server 2007 implementation at Melbourne Airport!

Read about it here.

Monday, October 02, 2006

Getting Mobile Emulator to run in MOSS 2007 Beta 2 VPC Image

No so long ago, I posted something about Getting Mobile in Microsoft Office SharePoint Server 2007. This configuration works fine if you're trying to set it up on a physical box. What I've come to realize is the steps do not work if you're trying to set it up in a VPC Image that has MOSS 2007 in it.

The installation steps are the same. Make sure you have the 3 setup files which are (you can install them in the order shown below):

1. Microsoft Device Emulator Version 1.0
2. Virtual Machine Network Services Driver
3. Emulator Images for Windows Mobile 5.0 with Messaging and Security Feature Pack

Next, install Microsoft ActiveSync 4.2

Launch the Pocket PC - Coldboot image by going to Start - All Programs - Microsoft Windows Mobile 5.0 MSFP Emulator Images - PocketPC Coldboot.

Next Cradle the image, by using the Device Emulator Manager. Start - All Programs - Microsoft Windows Mobile 5.0 MSFP Emulator Images - Device Emulator Manager.

You should be able to see the instance of the PocketPC listed. Right click on the instance and select Cradle.


ActiveSync will then come to live. It will prompt you to setup an ActiveSync partnership. You can click Cancel or just set it up if you wish to.

You're then ready to hit the SharePoint 2007 via the mobile device. Within the mobile device, Start - Internet Explorer. Type http://hostname/m. It will prompt you for credentials. Key in the username, password and domain.

You should then see...

Wednesday, September 27, 2006

Enabling Workflows for Site Content Type - Form

The default installation of the MOSS 2007 does not allow a user to associate a workflow with a form content type in a form library.

If you notice when you add a form to a form library and click on the drop down, the workflows option will not be available. If you add a document to a document library, the workflows option is available.

How can we then associate an individual workflow to a content type accross the site. Below are the steps:

  1. Go to the Top Level Site. Site Actions - Modify Settings - Modify All Site Settings.
  2. Under Galleries, click on Site Content Types.
  3. Under Document Content Types, click on Form.
  4. Click on Workflow settings.
  5. click on Add a workflow. Build your workflow by selecting one of the built-in workflows available.
  6. Give the workflow a name.
  7. Click Next.
  8. In the Default Workflow Start Values, if you want the user to define the Approvers manually upon the initiation of the workflow make sure the "Allow changes to the participant list when this workflow is started" is checked.
  9. Complete the rest of the settings and click OK.
  10. When the page has reloaded, click on "Update all content types that inherit from this type with these workflow settings".
  11. If you go back to the form library and click on an individual form, you'll notice that workflows option now appears. If you click on Workflows, you should be able to see the worklfow you've just configured and select on it.

The benefits of this is if you have a single content type that you want to have a workflow associated with it or an option of associating a workflow with it, this should be the ideal way to do it.

If not you can Go to an individual Form Library and click on Settings - Form Library Settings. Then follow steps 4-9. With this the workflow is only associated to that individual library.

Sunday, September 24, 2006

Upgrading the Microsoft VPC MOSS 2007 B2 Image on Tech DVD to B2 TR

Uninstalling Microsoft Office Mondo 2007 and Installing Microsoft Office 2007 (Beta)

Step1: Uninstall Office Mondo 2007 (Beta)

1. Go to Control Panel - Add and Remove Programs.

2. Select Microsoft Office Mondo 2007 (Beta), click Remove.

3. Click Yes when the dialog box pops up to remove Microsoft Mondo 2007.

Note: If you’re prompted to restart. Restart.


Step 2: Install Microsoft Office Professional 2007 (Beta)

1. Run the Microsoft Office product DVD

2. Select Microsoft Office Professional Plus 2007 (Beta)

3. Enter the VL Product Key when prompted.

4. Accept the License Agreement.

Note: Steps 5a and 6a optional if you’re after .NET Programmability Support for InfoPath.

5a. Click on Customize.

6a. Select “Run from Computer” for Visual Studio Tools for Applications.

7. Click on Install Now.


Step 3: Install Microsoft Office SharePoint Designer 2007 (Beta)

1. Run the Microsoft Office product DVD

2. Select Microsoft Office SharePoint Designer 2007 (Beta)

3. Enter the VL Product Key when prompted.

4. Accept the License Agreement.

5. Click on Install Now.

Note: Install all other Microsoft Office 2007 Beta Products before performing the upgrade. E.g. Microsoft Office Groove 2007, Microsoft Office Visio Professional 2007, etc.


Updating MOSS 2007 Beta 2 to Beta 2 Technical Refresh

Step 1: Confirm the Version of MOSS 2007

1. Go to SharePoint Central Administration

2. Click on Site Actions, select Site Settings.

3. Ensure the Version is 12.0.0.4017

Note: This can be checked under the Site Settings of any site.


Step 2: Uninstall Microsoft Windows Workflow Foundation Runtime Components Beta 2.2 (Build 3807.7)

1. Go to Control Panel – Add and Remove Programs.

2. Select Windows Workflow Foundation, click Remove.

3. Click Yes when the dialog box pops up.


Step 3: Install Microsoft .Net Framework 3.0

Note: This installs Windows Workflow Foundation version 4203.2.

1. Accept the terms, click on Install.

2. Click Exit to finish installation.


Step 4: Turn Off the Office SharePoint Server Search service

1. Go to Start - Programs - Administrator Tools - Services. / Control Panel – Services.

2. Select Office SharePoint Server Search and click on Stop.


Step 5: Turn Off the Windows SharePoint Services Search service

1. Go to SharePoint Central Administration.

2. Click Operations, and then select Services on Server from the Topology and Services section.

3. Find Windows SharePoint Services Search, and click Stop.

4. Click OK when the dialog box pops up.


Step 6: Run the WSS Technical Refresh Update

1. Start the update installation by double-clicking the update file.

2. Accept the End User License Agreement (EULA), and then click Continue.

3. After you accept the EULA, a confirmation dialog box is displayed. Click Yes.

4. Clicking Yes will start installation, beginning with the extraction of the update files.

5. After the update installation has finished, a dialog box will be displayed advising that additional components will require updating.

6. Click OK.

7. Another dialog box will pop up informing that the installation of the Beta 2 Technical Refresh for Windows SharePoint Services is complete.

8. Click OK.


Step 7: Run the MOSS Beta 2 Technical Refresh Update

1. Start the update installation by double-clicking the update file.

2. Accept the End User License Agreement (EULA), and then click Continue.

3. After you accept the EULA, a confirmation dialog box is displayed. Click Yes.

4. Clicking Yes will start installation, beginning with the extraction of the update files.

5. After the update installation has finished, a dialog box will be displayed advising that additional components will require updating.

6. Click OK.

7. Another dialog box will pop up informing that the installation of the Beta 2 Technical Refresh for Windows SharePoint Services is complete.

8. Click OK.


Step 8: Upgrade Configuration and Sites

1. Go to All Programs on the Start menu, click Microsoft Office Server, and then click SharePoint Products and Technologies Configuration Wizard.

2. A dialog box will pop up, click Yes.

3. Click Next to continue.

4. A dialog box will pop up informing that the following services will be reset during the configuration. Click Yes.

5. Click Next to continue.

6. A message is displayed asking you to run Setup on the remaining servers in the farm. Ignore this; click OK to continue.

7. The process will upgrade and update all the sites to Beta 2 Technical Refresh. Upon completion of the process, there will be a confirmation.

8. Click on Finish.


Verify that upgrade is completed by reviewing the upgrade log.

The upgrade.log file, located at %windir%\Program Files\Common Files\Microsoft Shared\web server extensions\12\LOGS, contains information about your update.

When the update is complete, the log file will finish with the string "upgrade session has finished". The log will also report if there are any errors or warnings. If errors or warnings have occurred, determine your next action based on information in the log file.

 
Step 9: Upgrade InfoPath Forms Services and workflow forms

1. Run the following from the command line

%windir%\Program Files\Common Files\Microsoft Shared\web server extensions\12\Bin\stsadm.exe –o reconvertallformtemplates

Step 10: Starting the WSS Search Service

1. Go to SharePoint Central Administration.

2. Click Operations, and select Services on Server from the Topology and Services section.

3. Find Windows SharePoint Services Search, and then click Start.

4. Fill in the required fields, and click Start. You should choose a different default search database name to start this service.

5. Click Start.


Step 11: Run the Office 2007 Beta 2 Technical Refresh Update

1. Start the update installation by double-clicking the update file.

2. Accept the End User License Agreement (EULA), and then click Continue.

3. After you accept the EULA, a confirmation dialog box is displayed. Click Yes.

4. Clicking Yes will start installation, beginning with the extraction of the update files.

5. After the update installation has finished, a dialog box will be displayed advising that additional components will require updating.

6. Click OK.

7. Another dialog box will pop up informing that a reboot needs to be done to complete the installation of the Beta 2 Technical Refresh for Microsoft Office 2007.

8. Click Yes.


Step 12: Run the SharePoint Designer 2007 Beta 2 Technical Refresh Update

1. Start the update installation by double-clicking the update file.

2. Accept the End User License Agreement (EULA), and then click Continue.

3. After you accept the EULA, a confirmation dialog box is displayed. Click Yes.

4. Clicking Yes will start installation, beginning with the extraction of the update files.

5. After the update installation has finished, dialog box will pop up informing that a reboot needs to be done to complete the installation of the Beta 2 Technical Refresh for Microsoft Office SharePoint Designer 2007.

6. Click OK.


To download the steps above accompanied with screenshots, click here.

Friday, September 15, 2006

"Wait for value to equal value" action in SharePoint Designer 2007

Some of the experiences I've had with building a workflow in SharePoint Designer 2007. If you're working with the "Wait for value to equal value" action and then "Send an email" action, take note of these:

  • Make sure outgoing email settings are enabled on the server.
  • If the server goes down (or iisreset) while the workflow is paused, then the email will never be sent.
  • If using on-edit, subsequent edits to the same list item will not start the workflow again until the first one has finish - there is no queuing attempts to start the same workflow on the same list item, they will be ignored.

Saturday, September 09, 2006

Getting Mobile in Microsoft Office Sharepoint Server 2007

To get working on the mobile part of MOSS, what you'll need to do is download the Microsoft Windows Mobile Emulator. Follow steps for downloading the emulator, there are three download files. It's best that you install the emulator on the server hosting MOSS. Don't have to worry too much about the networking.

The emulator will allow you to emulate a PDA or Smartphone. I'm more interested in the PDA for now. So below are the steps to get the emulator working and having your first peek at MOSS on a mobile device.

  1. To setup the emulator- install the Virtual Machine Network Services Driver, Emulator Images for Windows Mobile 5.0 with Messaging and Security Feature Pack, Microsoft Device Emulator 1.0 .
  2. Start the PocketPC-ColdBoot from the Start menu.
  3. Map your physical network card to the device [File > Configure > Network Tab > Enable ‘NE2000 PCMCIA adapter and bind to’ and click ‘OK’].
  4. In the Windows Mobile interface [Start > Settings > Connections > Network Cards].
  5. Choose 'The Internet' on the 'My netword card connects to' drown down list.
  6. Click on 'NE2000 Compatible Adapter'
  7. Configure the IP Address and Name Servers to be in the same network environment as the MOSS server (ensure that the subnet mask is the same).
  8. Click on 'OK' till you're all completed and back at the home screen.
  9. On the Emulator application, disable and enable the network card mapping [ File > Configure > Network Tab > Enable ‘NE2000 PCMCIA adapter and bind to’] , the icon will change briefly on the mobile device screen.
  10. Once you've been reconnected, launch Internet Explorer from the Start menu in the mobile device.
  11. Type your portal url with a /m at the end. E.g. http://moss2007/m
  12. Enter your login credentials and the mobile home of the portal will appear!

Saturday, July 08, 2006

Microsoft E-Learning: Microsoft SharePoint Services 3.0 (Beta)

Microsoft E-Learning is offering a free online course for 90 days to get to know Microsoft SharePoint Services 3.0 (Beta).

Click here to get it! A good introductory to SharePoint Services 3.0 (Beta). There's also a Hands On Lab to further enhance the learning experience.

I've gone through it. Gives a good overall understanding of Sharepoint Services 3.0 (Beta) and you can easily see the difference with v2.0.